's Blog")
Tags
12c, Apache Maven, archetype, Eclipse, IDE, IntelliJ, java, JDeveloper, jProwlAPI, maven, mvn, Oracle, Oracle Java Cloud, OTN, POM, prowl, ProwlAPI, sourceForge
So continuing from my previous posts:
We’re going to use the Prowl API and create the equivalent classic “Hello World” App using the push framework – but cutting out the need for Growl etc. For this blog post we’re not going to use the Oracle Java Cloud as we need to see the code working locally and get ready to promote the code to the cloud. ![]() Once we’ve got some code working we can look at setting up the Java Cloud environment, package and promote what we have here using our IDE into the cloud environment.
Once we’ve got some code working we can look at setting up the Java Cloud environment, package and promote what we have here using our IDE into the cloud environment.
As we’re cutting Java code now – you can obviously use your own preferred IDE, I’m going to use JDeveloper 12c if for no other reason than it being a huge improvement on 11g (download here) and I’ve become somewhat disappointed with Eclipse. Whilst talking about IDEs; you should be aware that Oracle provide an Oracle Cloud SDK which integrates with a number of IDEs to make some of the interactions with the cloud straight forward.
The SDK provides Ant and Maven scripts to help the build and deploy process – so we will be using those later, plus command line tools to help manage other activities, a number of code examples and HTML documentation. To setup the SDK you will need to unpack the file into a folder and add that folder into your PATH environment variables. The bundle includes a readme that contains just enough to show what is required to get unpacked and make the command line tools work.
To download from Oracle you will need to setup an Oracle Technology Network (OTN) account – so if you don’t have one now is the time to create one – there is no cost to this, we’re going to need
We could use the REST based API that is provided by the ProwlApp, but at least to start with we’re going to follow the approach using a library to make using the API very simple. By using the API provided on SourceForge (jProwlAPI). Using an API will allow us to show the use of 3rd party libraries in the cloud deployment but also follows some of the Oracle ideas of offering ‘adaptors’ to simplify integration.
So you need to download:
- JDeveloper 12c – http://www.oracle.com/technetwork/developer-tools/jdev/downloads/index.html (if you want to use JDeveloper as shown)
- The jProwlAPI from SourceForge
- Oracle Cloud SDK
So with this downloaded we are going to:
Setup an new Maven based project (or copy my file structure into place and import) using a maven quickstart archtetype (org.apache.maven.archetypes:maven-archetype-quickstart) . We will probably need to modify this later to leverage the full cloud capable archetype. This will build your project environment and retrieve a bunch of plugins you might need.
Next lets take a peak inside of the jProwlAPI download. You’ll see an example bit of java that shows how to fire the API. Rather than tinker with this we have created a small package and JUnit test as we would if writing a proper solution created with the maven archetype.
We also need to make the JProwlAPI jar file available to the project. So we use maven pattern, and create a folder called lib and copy the jar file into it. We then add the lib folder to project setup.

To be able to create the deployable artefact we need to load the jar file into the local repository, which we can do with a command line instruction (presuming maven is also available by your PATH variable).
mvn install:install-file -Dfile=./lib/JProwlAPI-0.5.jar -DgroupId=prowl -DartefactId=JProwlAPI -Dversion=12.1.3-0-0 -Dpackage=jar
We’ll come back to the command line in a bit, but within JDeveloper the code I have provided needs 1 change from yourself – replace the references to –YourAPIKey– in the run execute command and in the JUnit class with your own key.
In the the ProwlProcessor class I have included a man in method so we can just execute the class to see things working. So having done that we can then repeat by running the class via the JUnit test. You should see the same result. When we we’ve deployed or class to the cloud we can use the JUnit test to invoke the cloud.

The last step, within the IDE we have been compiling to get the class, but not creating a deployable jar file. We could do this with the IDE but we would also in a real development condition be creating artefacts via a Continuous Integration tooling which will effectively fire the maven command line like interface. So let’s do that to create the jar files, using the following command:
mvn clean package
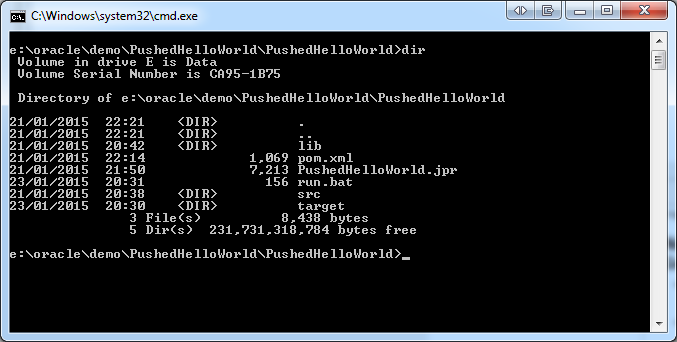
You should then see a folder created if not already there and a jar file reflecting the values in the POM file, that we can see below.

So we have enough now we could in theory deploy a jar to a weblogic container and fire it from a Unit test. In the next post we’ll deploy and execute the unit test, and throw a crude front end into the mix.

You must be logged in to post a comment.